

This section is primarily about working with aluminum metalized boPET, more commonly known as Mylar. This is a common product that is available in rolls. It’s great for this purpose because it reflects light, is waterproof, and is fire retardant. One of its commercial applications is as an insulating home wrap. For these reasons you can be comfortable, in the sense that you aren’t endangering your home, installing Mylar all over the walls and ceiling of your plant room. It is non-conductive and fire-resistant. Be aware that it is very insulating. It’s a good thing to have on an exterior wall.
Mylar is extremely smooth and tape tends not to adhere to it well. For this reason, I used thumb tacks. Yes, it does leave little holes all over the wall. Mylar is very light and it is not difficult to support its weight with tacks, even on the ceiling.
The trickiest thing about it is getting it smooth. It’s going to stretch a little after hanging. You will drive yourself nuts if you try to make it to perfect. That being said, adjusting it a little can be worthwhile. The point is to keep more of the light bouncing around the room as opposed to being absorbed by the walls, not to see mirror images of your plants.
Panels
I live in the high desert, where the humidity is low. I also have no children or pets. For these reasons, I was able to put my plant room in an area that was not a fully separated room closed off by a door. In my case, I originally used the dining area in my one-bedroom condominium. Later I realized that there was a lot of space in our bedroom and that the lights were on the same 16 hours I was not in bed, so I relocated it to part of the bedroom.
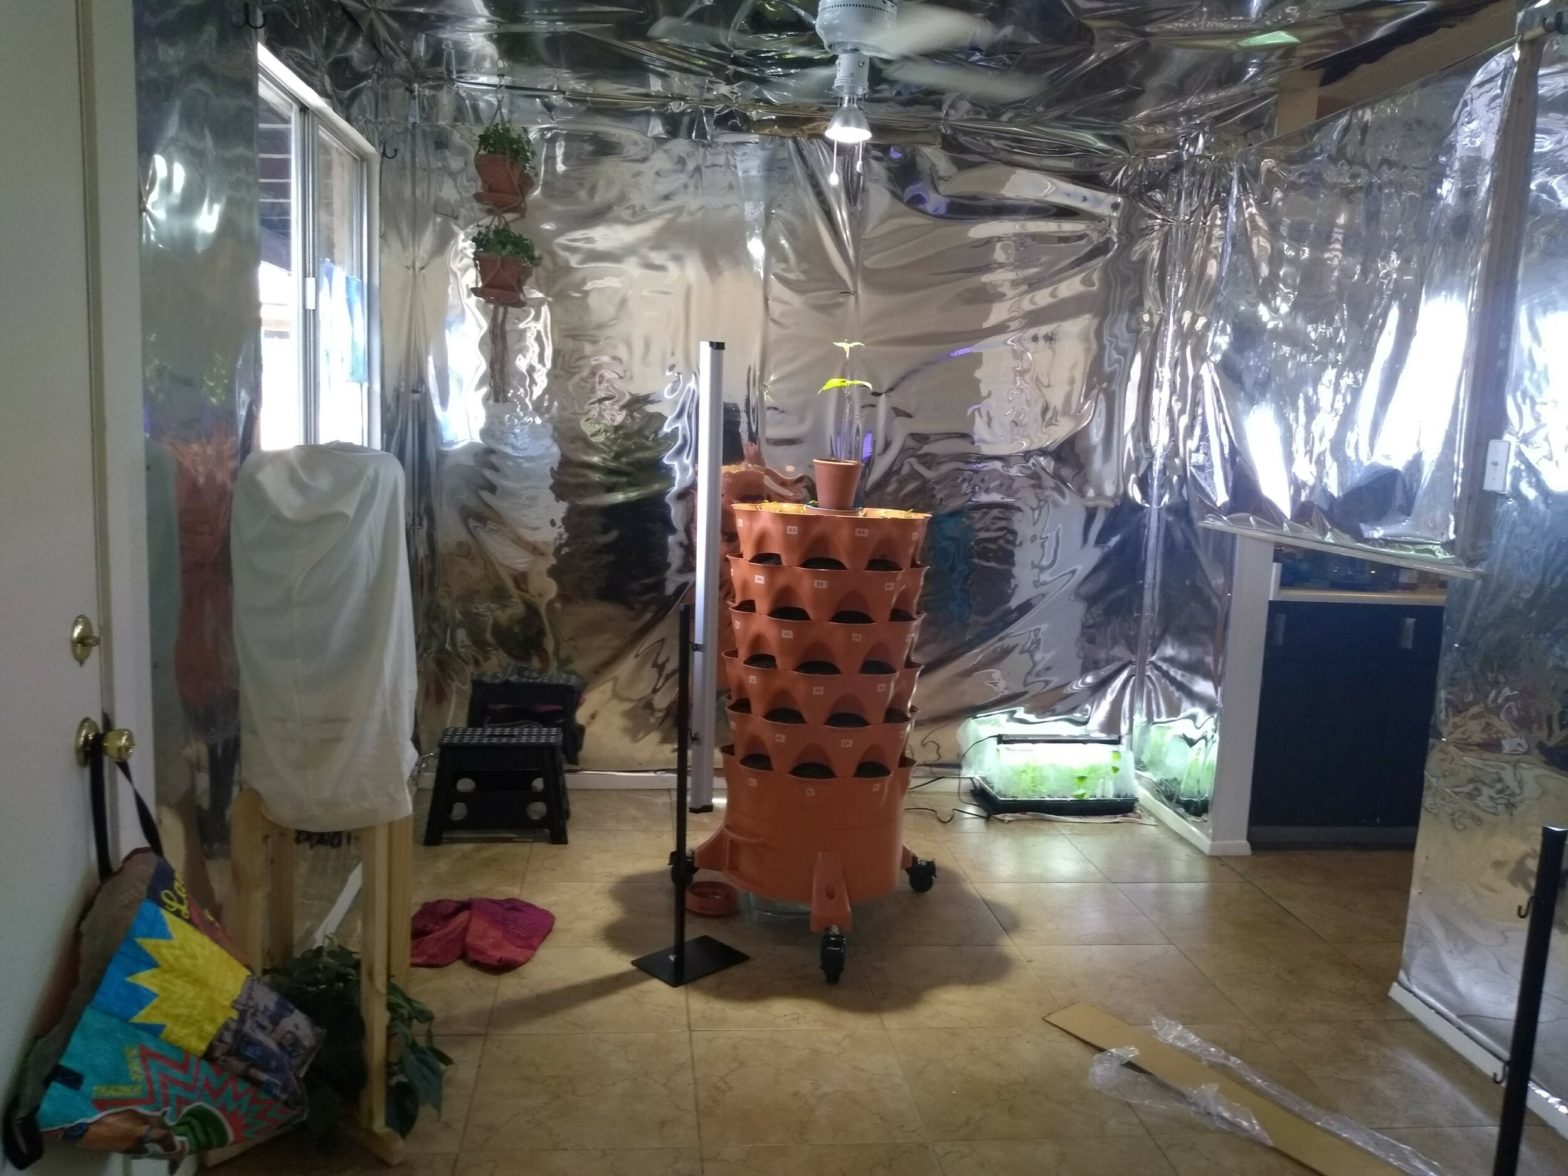
In both cases, I made panels of bamboo shades with Mylar attached to create a partition between the living area and the garden room. I purchased inexpensive bamboo roller shades and attached panels of Mylar to them. In the original garden room, I used a hot glue gun. The panels I chose are very simple. If I had small children I would have spent a little more to avoid the choking hazard of the long cords.
Hot glue guns are simple electrical devices that you put a stick of heat glue into and plug in. The tip has a heating element that melts the glue. They have a trigger, and when you pull it, it moves the glue sticks forward by a tiny amount and pushes a small amount of melted glue from the tip.
These are widely available and used by many for crafts or very light assembly. Mylar, as I mentioned before, weighs very little. It is a little prone to tearing, and tape tends to release from it quickly. For purposes where it must be seen the approach worked pretty well, but I found I had to redo the process, when it releases, maybe twice per year.
Currently, I am using plastic clamps from the hardware store. These are visible and I might think twice about this if they were not in the room and not really attractive. They are much easier, and so far, have never failed.

Conveniently, the rolls of Mylar and these bamboo shades are the same width! Purchasing this item in this very standard size means that you only have to measure out the length of your Mylar and cut it once. Then simply use the hot glue gun to glue it to the shade.
Experience has taught me that you should put a solid bead of glue along the top of the panel. The sides and bottom only require occasional dabs of glue. As I have said the Mylar is very light and it doesn’t take much to support it.
Sheetrock hooks, such as those that might hold a hanging basket are appropriate for supporting the shades and the Mylar. From these S hooks are hung which then support the partitioning shade.
Ceilings
How difficult hanging Mylar on your walls and ceilings depends a lot on how perfectionist you want to be about it. As I keep pointing out, Mylar is very light. This makes it much easier to install. Also the whole process is dry, I have not used any sort of glue.
I did it by myself, but the process would be much easier with two people both with step ladders.
You should note any obstructions, such as light fixtures. For pieces on the ceiling, it will be easier to cut the panels on the ground than it will be to cut around the obstruction. The easiest approach to these is to piece around them with smaller sheets of mylar, holding them up with thumbtacks.
Consider where you could use whole four-foot widths. These are the easiest case. Simply measure out the lengths and cut them. As it happens, we have tile floors, and the tiles have grout lines that are aligned which I can use for a long straight line. I measure out the end from the grout line and use another perpendicular straight grout line to keep the edge square.
If you will be hanging this alone, it is much easier to cut the Mylar into four-foot by four-foot squares and hang those instead of larger areas. Being able to reach the whole length of a side hugely reduces the difficulty involved with the installation.
Once the Mylar is rolled out to that length I use a table knife to score a line into it, along the grout line I was referring to earlier. This mark is very clear on Mylar, and I simply cut along it with scissors.
If you are working by yourself, that first corner is the hardest. You will discover what a great thermal insulator Mylar is while you are standing beneath it hanging in the first corner. Worse, you must put two or three thumbtacks in close proximity, even though you will probably have to move two of them, to avoid tearing the Mylar around the post of the first thumbtack when you release it.
The next three thumbtacks will go near the corner of the panels. These are also temporary. As you can probably see at this point, it probably doesn’t look very straight.
Return to the first corner, and remove two of the three thumbtacks. You should probably rig a tool for tack removal. You will be doing a fair amount of this.
Working along a wall, preferably from a corner where two walls meet, and pulling the material snug, but not enough to stretch it, insert the next tack about a foot from the first tack.
Now put the next tack a foot along the other wall, again, trying to keep it snug without stretching.
The next tack goes out in the open ceiling, about a foot in from the last two tacks you installed to make a one-foot square in the corner. Continue in this way, slowly expanding out from that corner. The tacks away from the edge can be occasional, rather than one every foot.
This part, the ceiling, is by far the most difficult and it does take some time. It’s also a little frustrating. The walls are much easier.
Walls
Walls are much easier. It is pretty easy to tack down the top of the Mylar and neatly cut around the lower obstacles as you work downward with the thumbtacks.
You will only need them along the outside edge, and wherever you cut around objects or spaces. After the ceiling, this will all seem very easy.